Widgets let you add and update some extra features on your site like pages, text, images, etc.
-
-
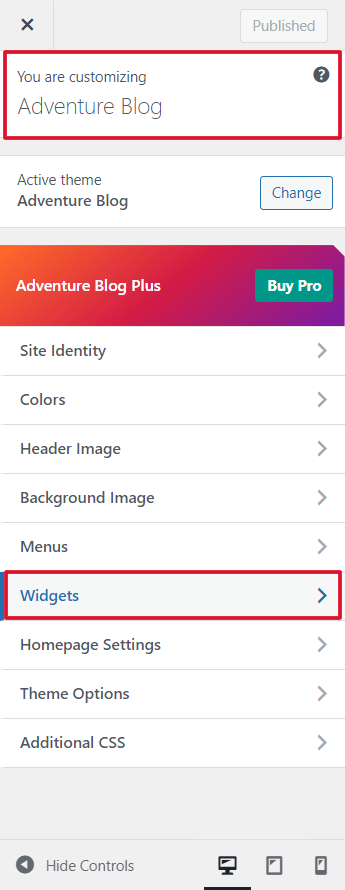
- From Customize, go to Widgets.
- You will get the options to add, edit and delete widgets on given locations.
- If the preview is ok click on Publish to save the changes.
-
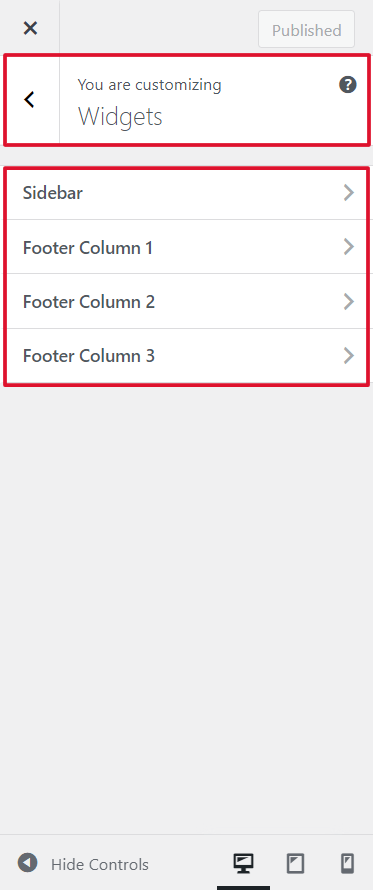
Widgets include the followings options:
-
-
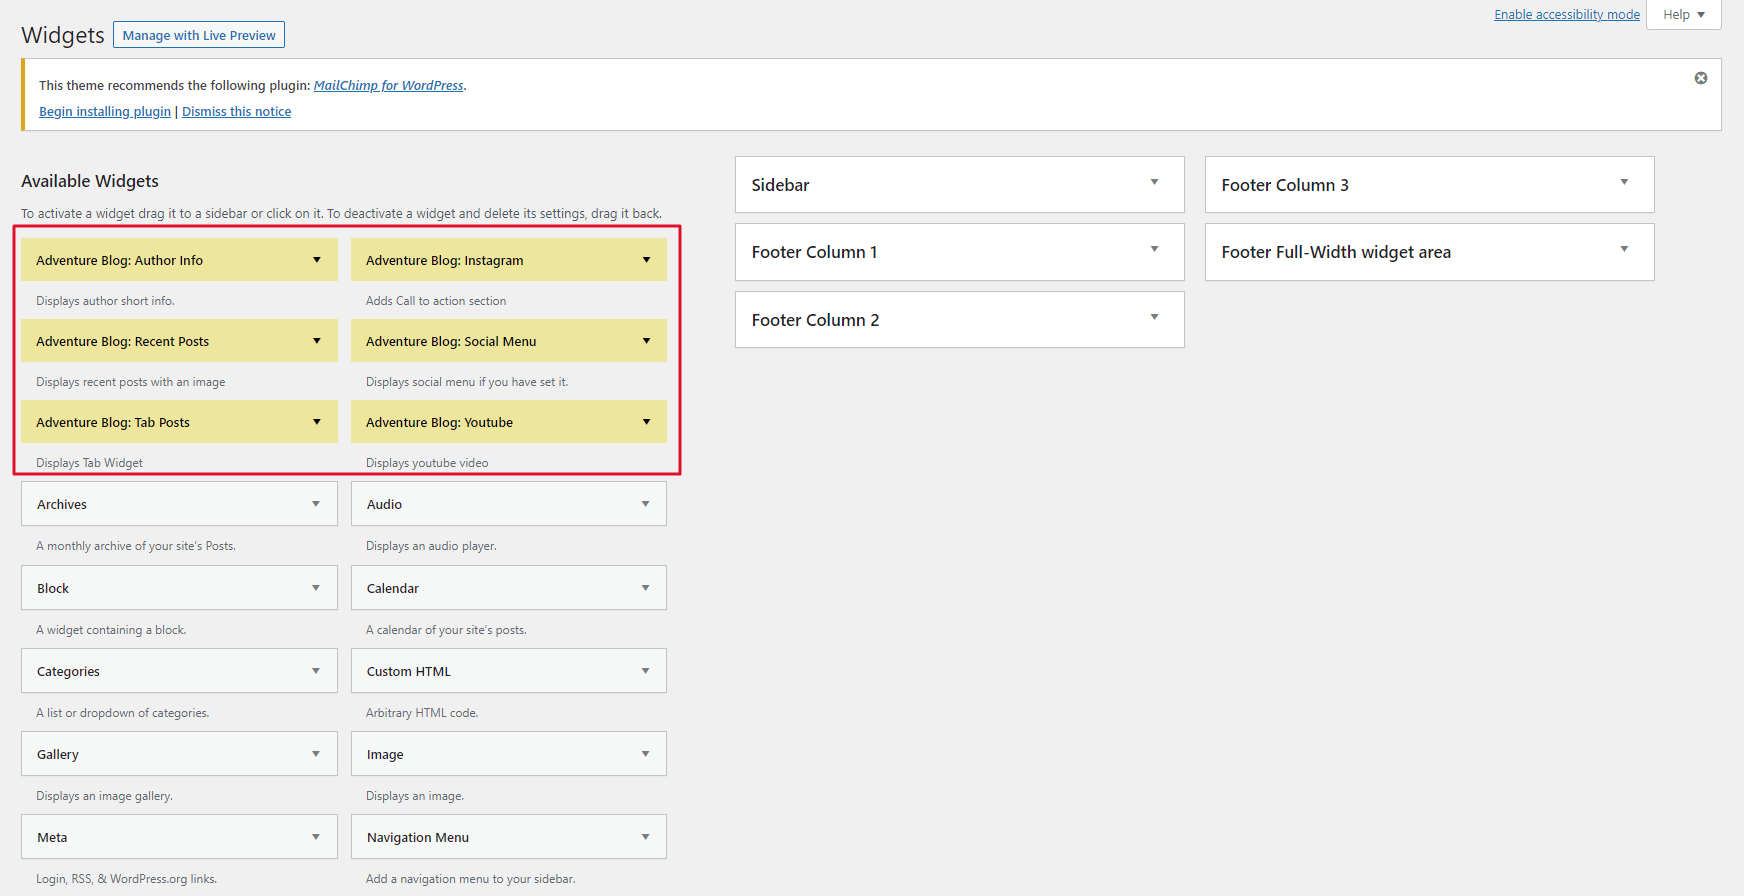
- Sidebar
- Footer Column 1
- Footer Column 2
- Footer Column 3
-
1) Sidebar
-
-
- Go to Customize > Widgets > Sidebar.
- You can add, customize, and delete widgets in a sidebar area.
- Click on Publish to save the changes.
-

2) Footer Column 1
-
-
- Go to Customize > Widgets > Footer Column 1.
- You can add, customize, and delete widgets on a footer one area.
- Click on Publish to save the changes.
-

3) Footer Column 2
-
-
- Go to Customize > Widgets > Footer Column 2.
- You can add, customize, and delete widgets on a footer two area.
- Click on Publish to save the changes.
-

4) Footer Column 3
-
-
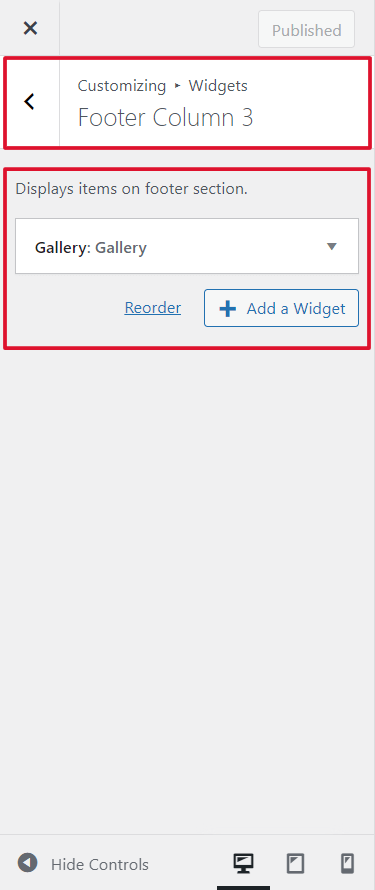
- Go to Customize > Widgets > Footer Column 3.
- You can add, customize, and delete widgets on a footer three area.
- Click on Publish to save the changes.
-
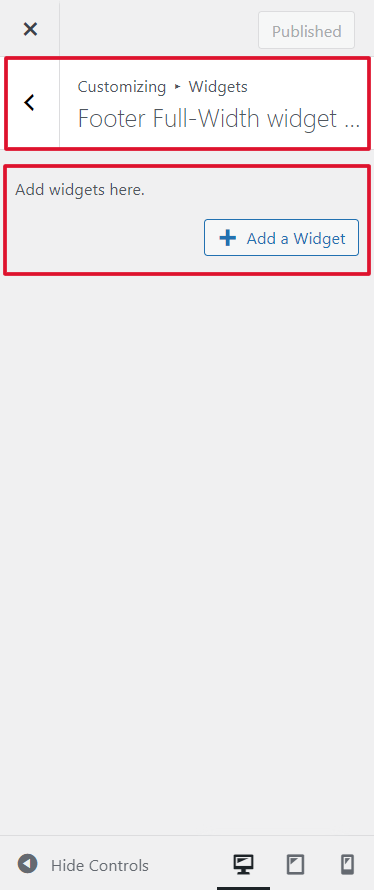
5) Footer Full-Width Widget Area
This is an additional widget area that is in the premium theme only.
-
-
- Go to Customize > Widgets > Footer Full-Width Widget Area.
- You can add, customize, and delete widgets on a footer full-width widget area.
- Click on Publish to save the changes.
-
In Adventure Blog-Plus Premium theme:
There are various of different widgets added to the premium theme.
-
-
- Adventure Blog: Author Info
- Adventure Blog: Recent Posts
- Adventure Blog: Tab Posts
- Adventure Blog: Social Menu
- Adventure Blog: Instagram
- Adventure Blog: Youtube
-
1) Adventure Blog: Author Info
-
-
- Go to Appearance > Widgets > Adventure Blog: Author Info.
- You will get to manage the title, and author name, short description.
- You will get to enable the imaged border radius and upload the author’s image.
- You will also get to choose a different option for style and manage different social media URLs.
- Click on Saved to save the changes.
-

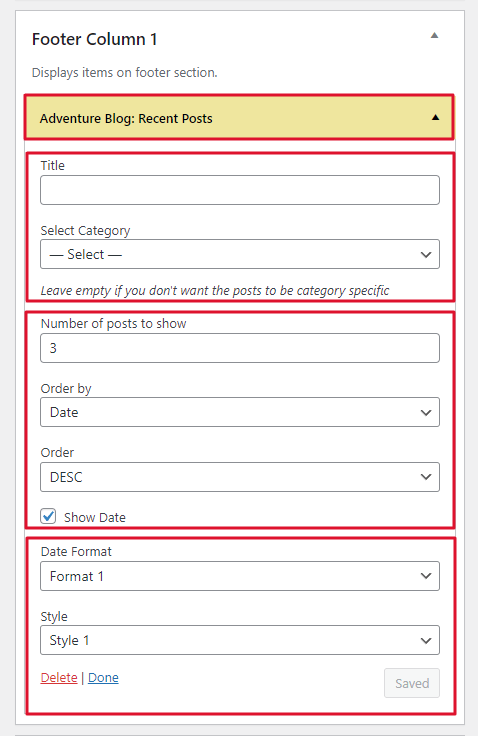
2) Adventure Blog: Recent Posts
-
-
- Go to Appearance > Widgets > Adventure Blog: Recent Posts.
- You will get to manage the title and enable the show date.
- You will get to choose a different category and select a number of posts to show.
- You will also get to choose a different option for style, date format, order, and order by.
- Click on Saved to save the changes.
-
3) Adventure Blog: Tab Posts
-
-
- Go to Appearance > Widgets > Adventure Blog: Tab Posts.
- You will get to enable the show date.
- You will get to select a number of posts to show for popular, recent, comments, and tagged.
- You will also get to choose a different option for style, date format, and image size for featured posts.
- Click on Saved to save the changes.
-

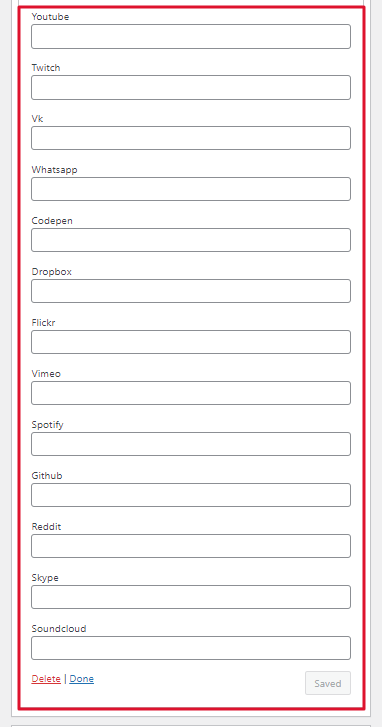
4) Adventure Blog: Social Menu
-
-
- Go to Appearance > Widgets > Adventure Blog: Social Menu.
- You will get to manage the title and choose a different option for style.
- Click on Saved to save the changes.
-

5) Adventure Blog: Instagram
-
-
- Go to Appearance > Widgets > Adventure Blog: Instagram.
- You will get to manage the instagram title, username, and token.
- You will also get to manage the limit and display the number of images.
- Click on Saved to save the changes.
-

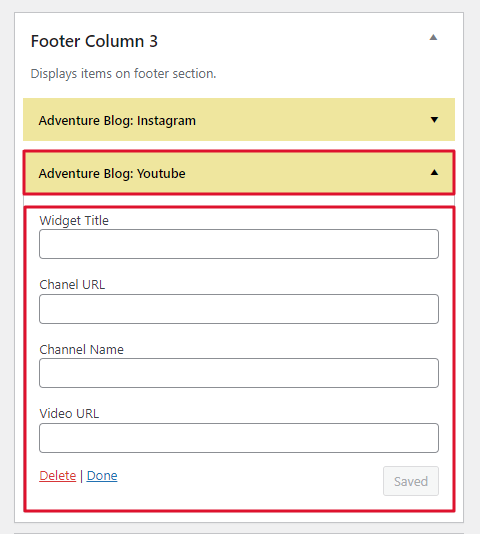
6) Adventure Blog: Youtube
-
-
- Go to Appearance > Widgets > Adventure Blog: Instagram.
- You will get to manage the widget title, channel name, channel URL, and video URL.
- You will also get to manage the limit and display the number of images.
- Click on Saved to save the changes.
-